|
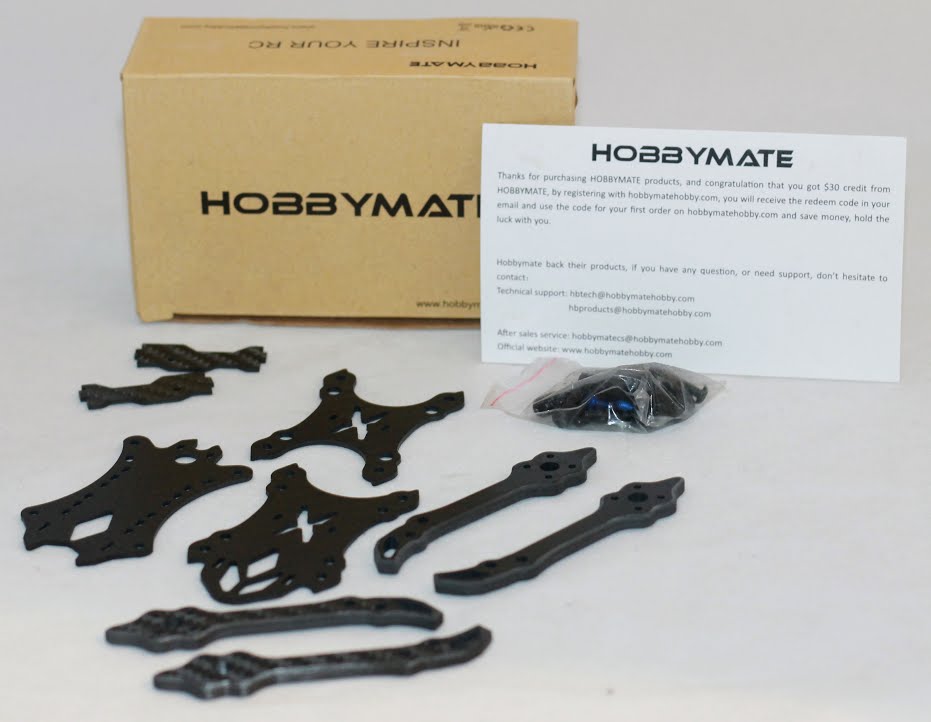
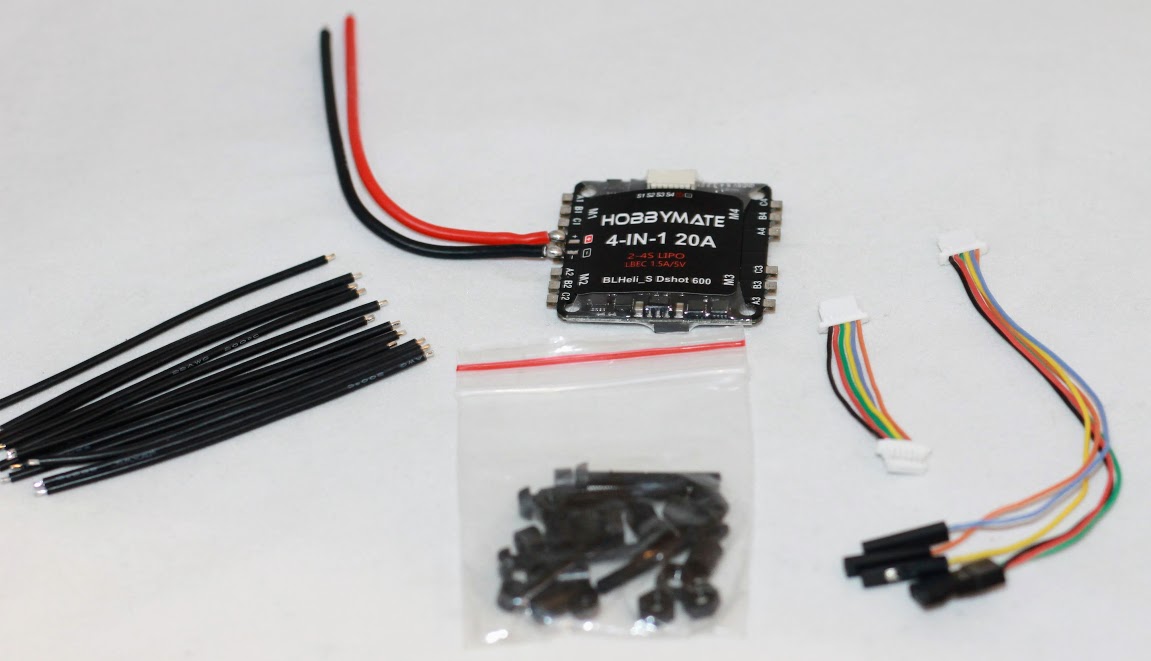
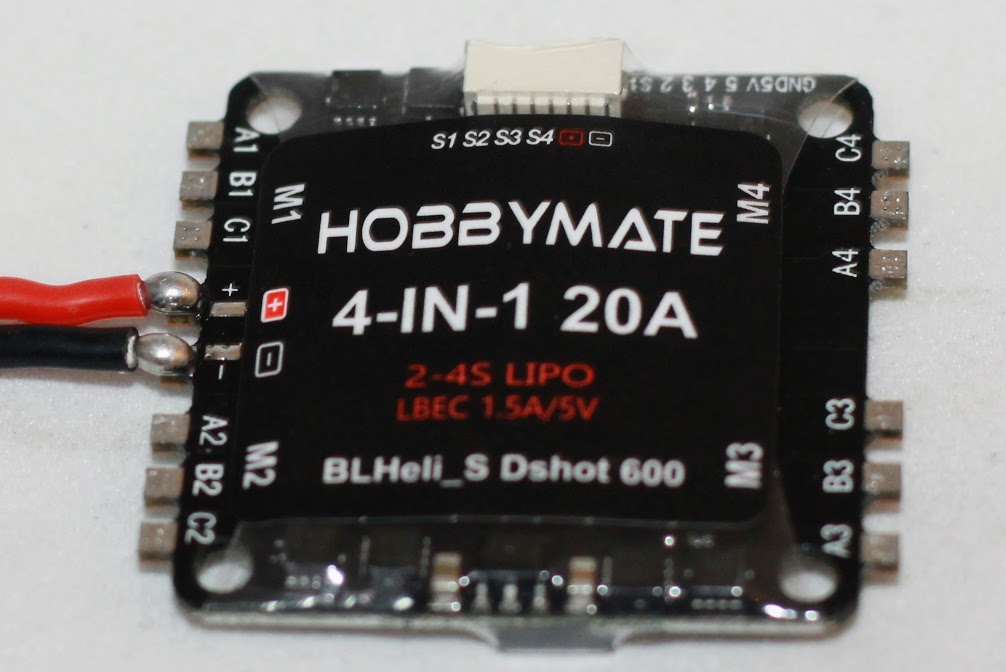
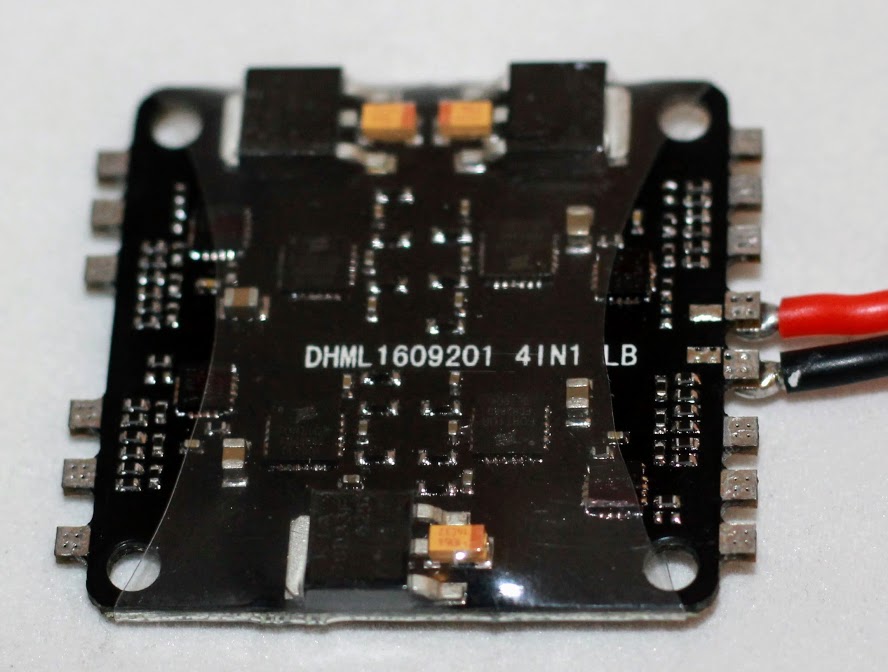
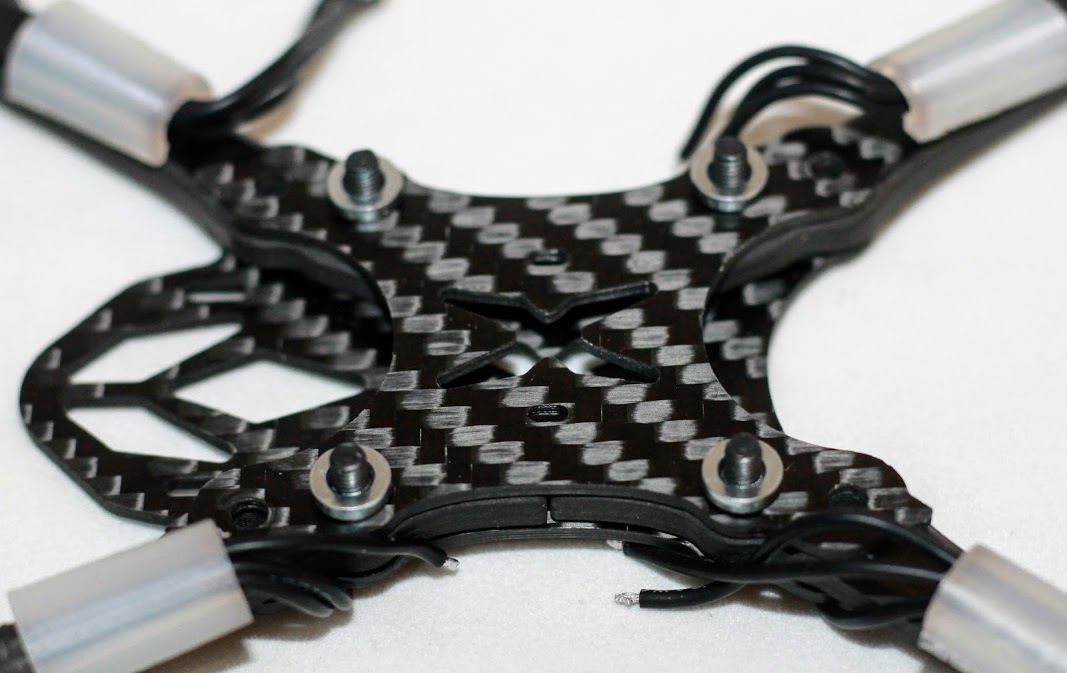
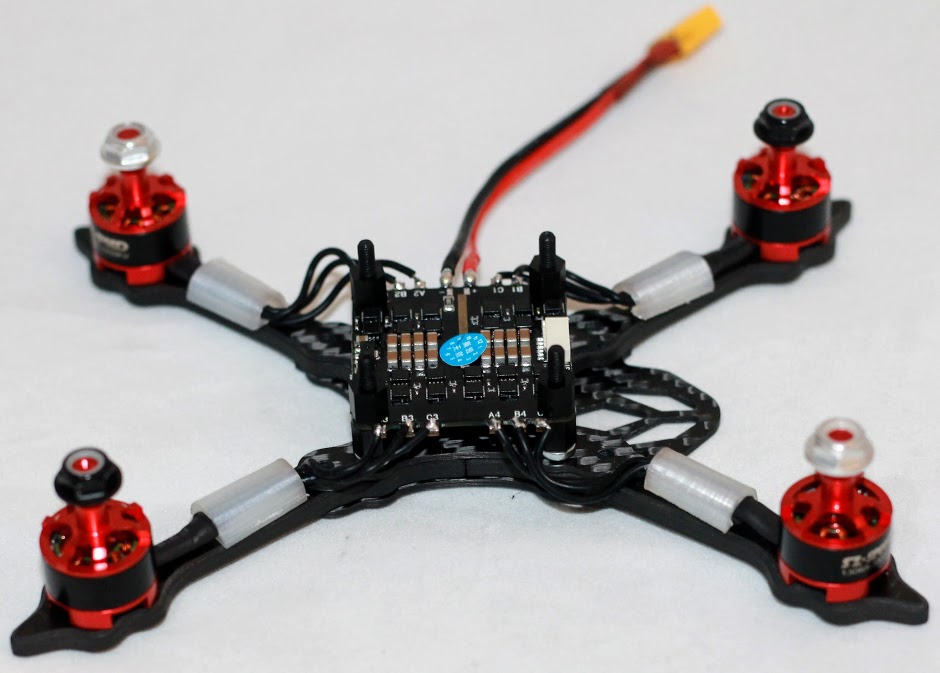
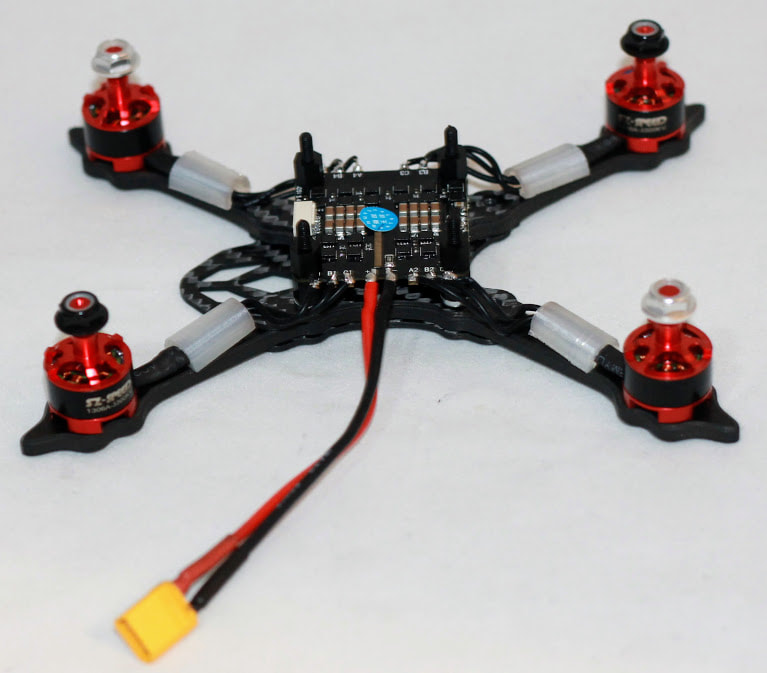
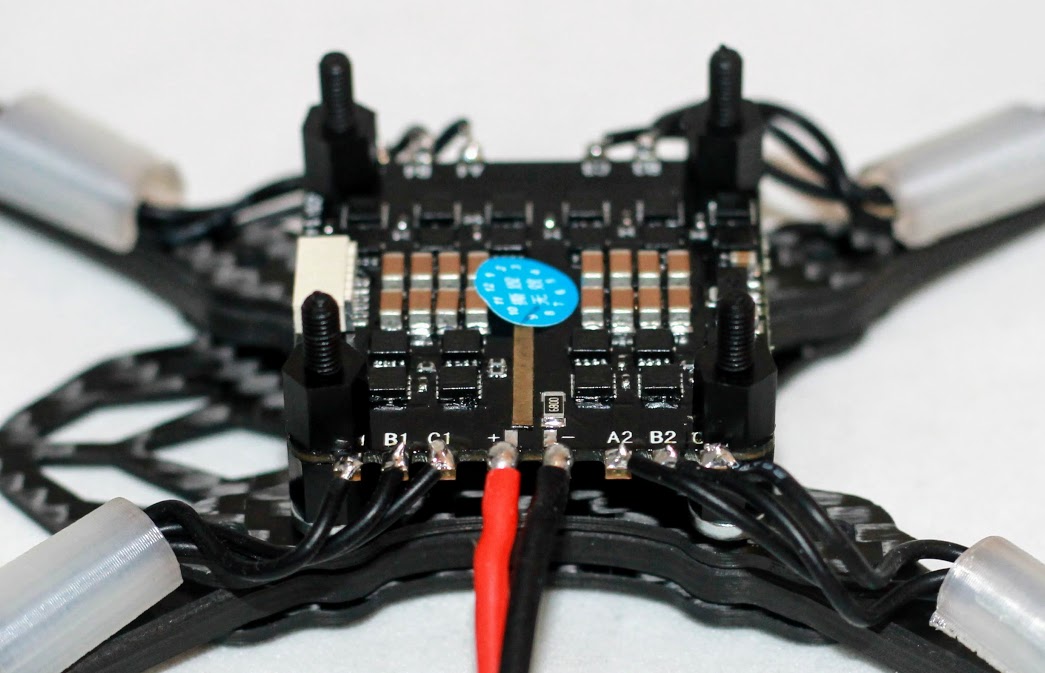
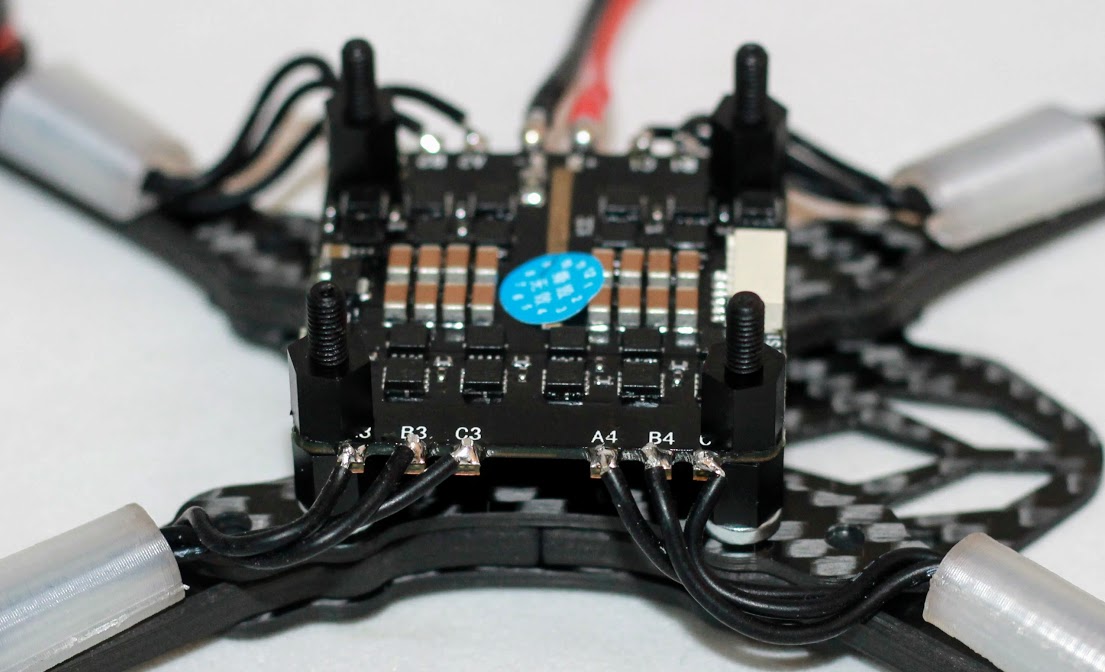
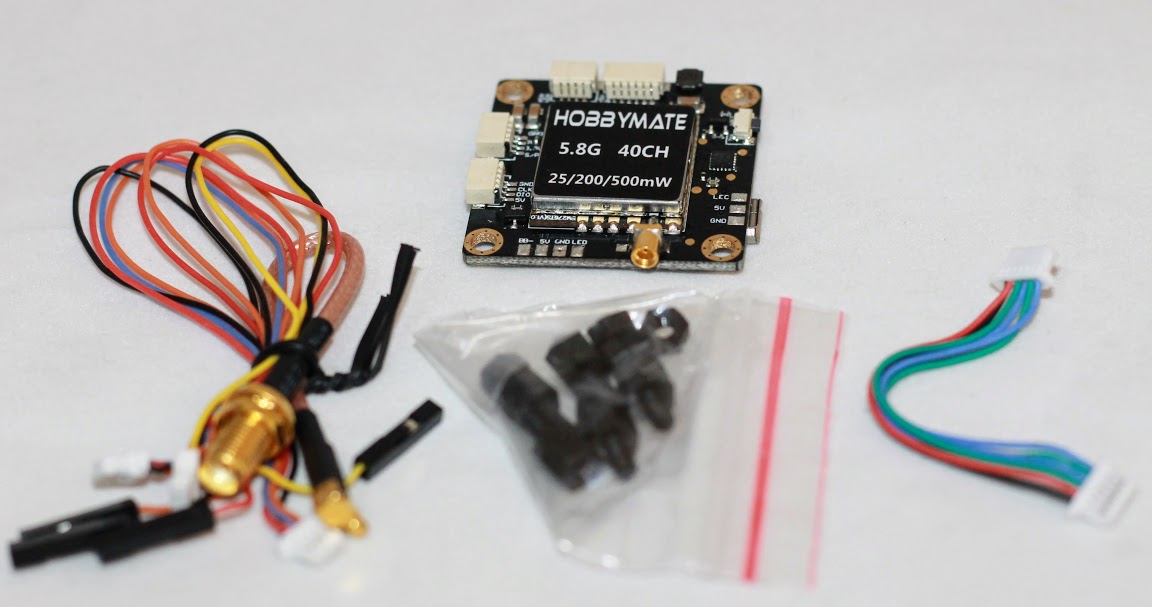
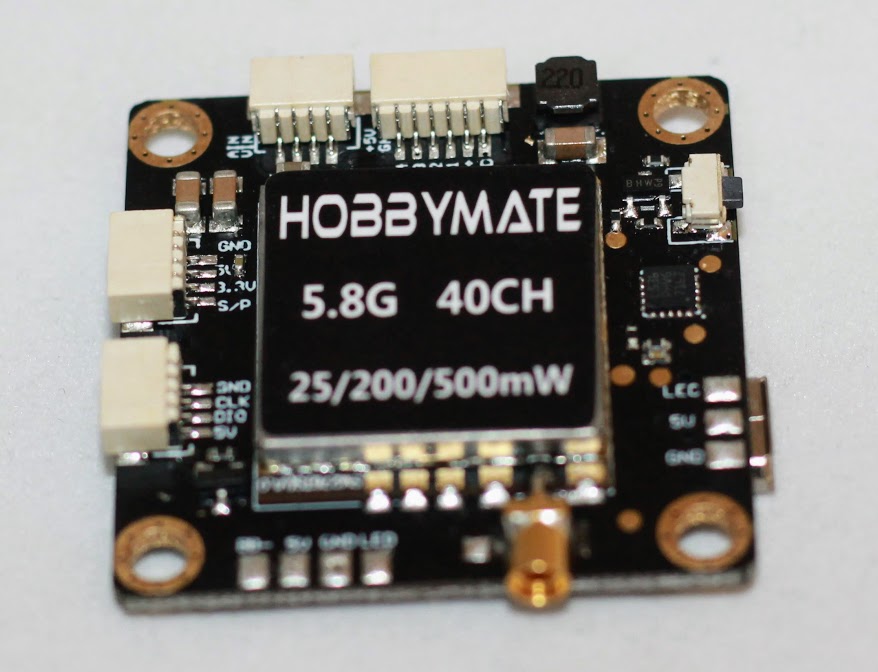
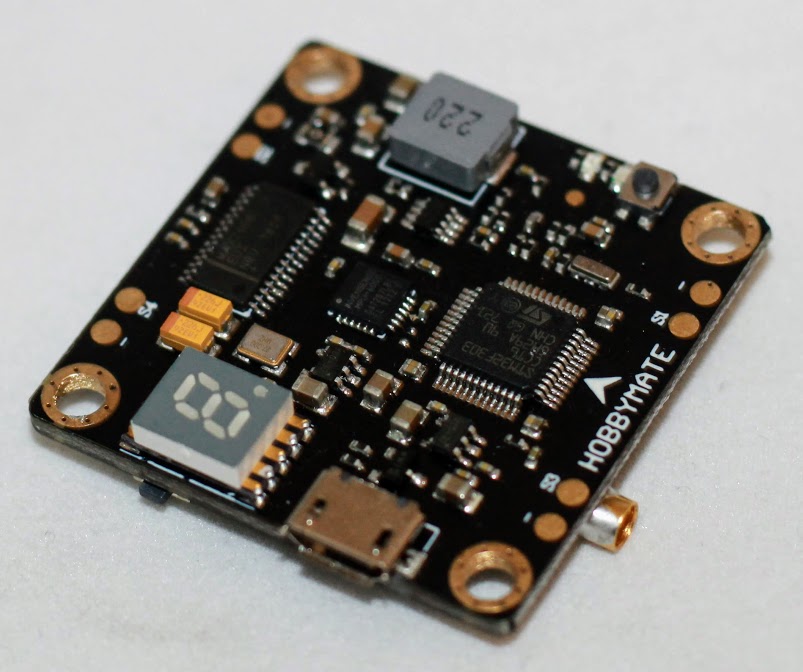
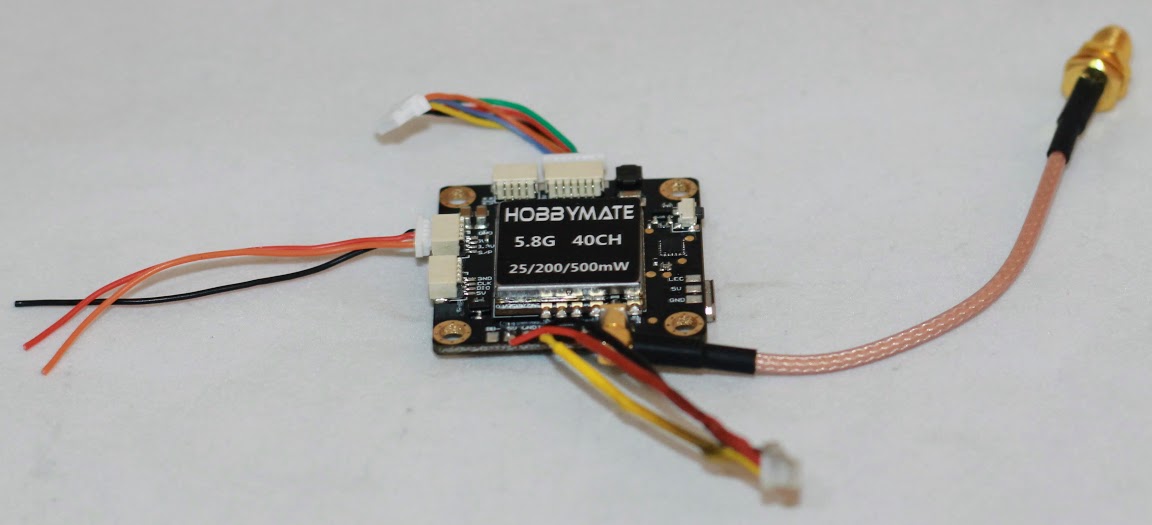
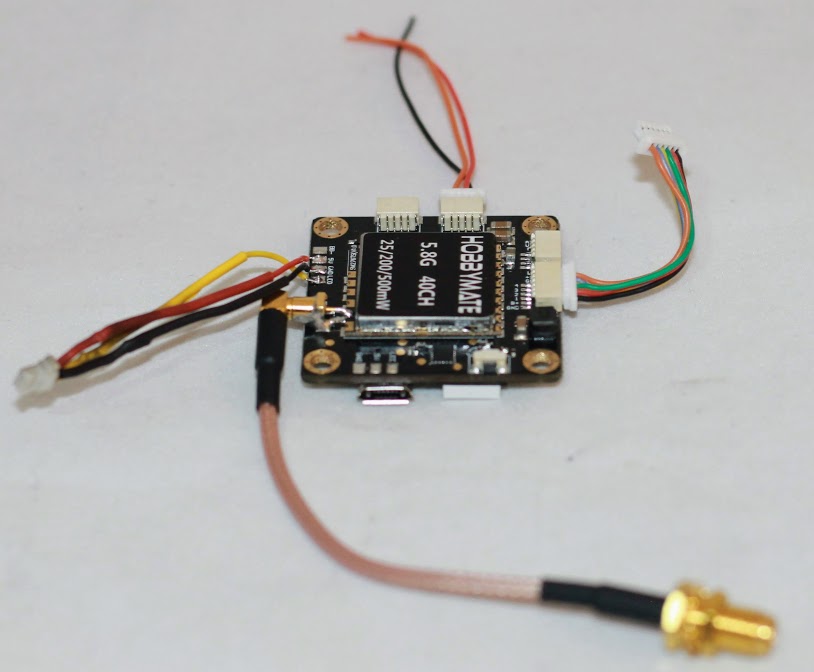
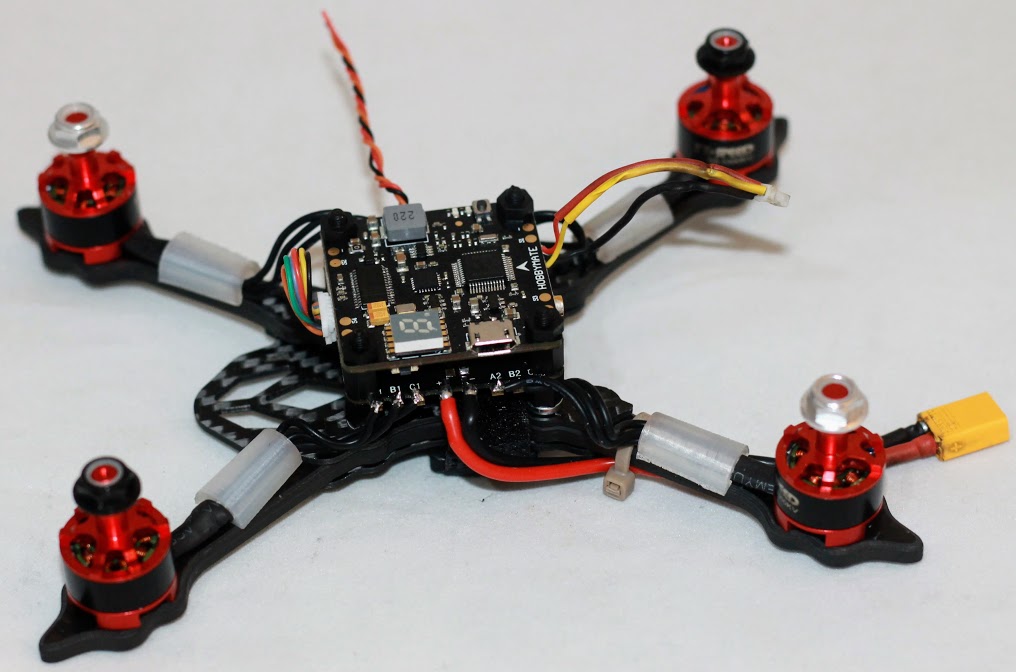
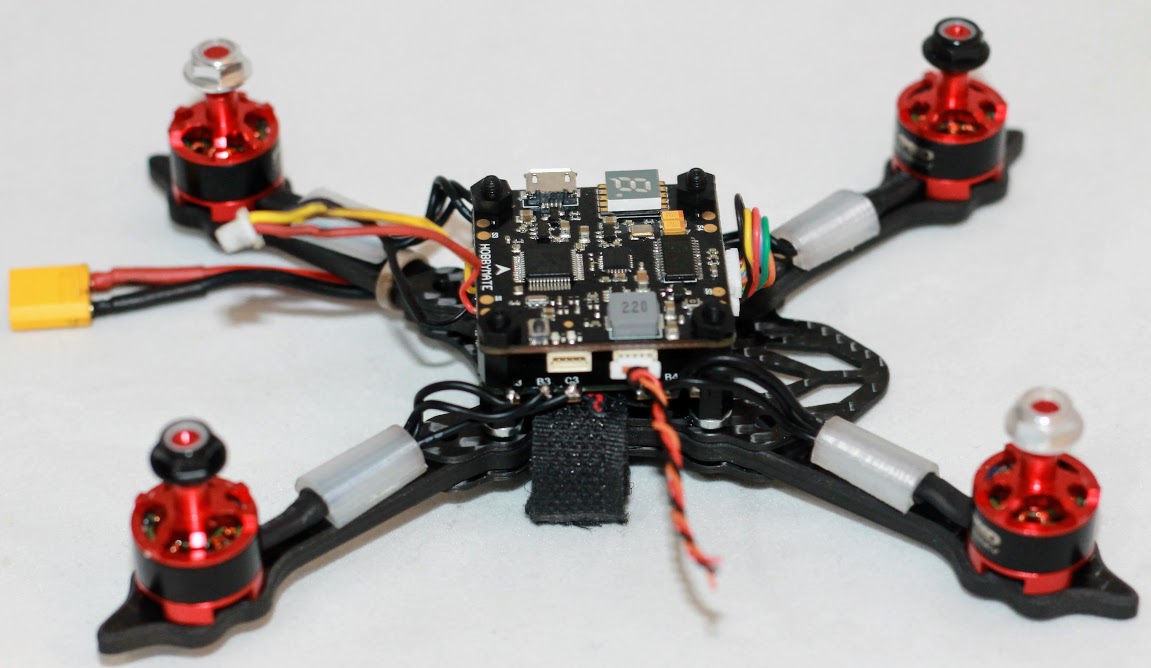
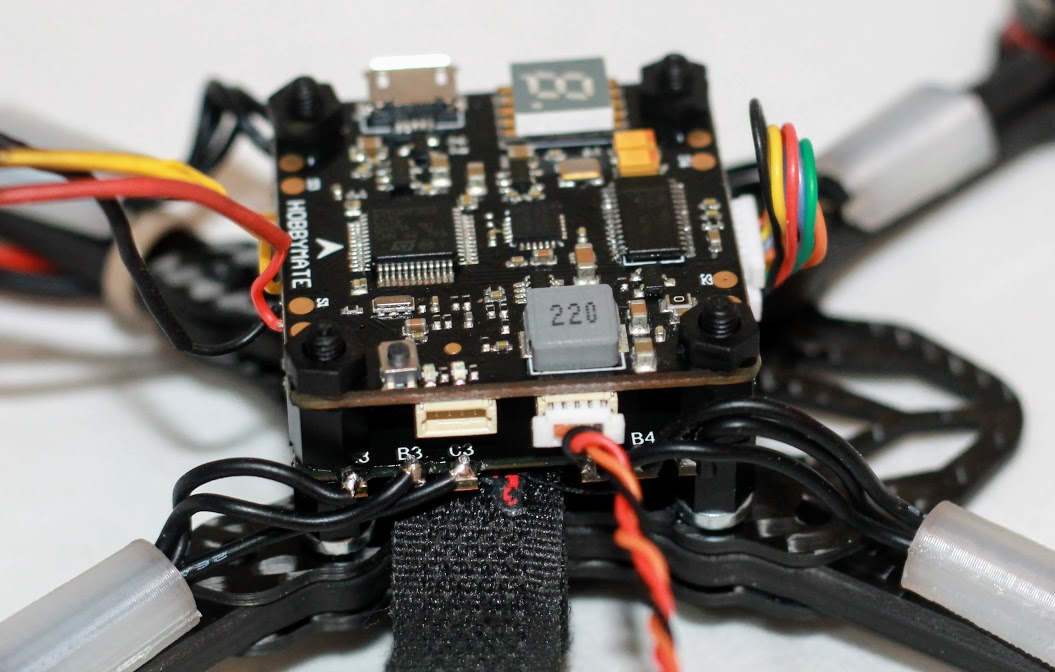
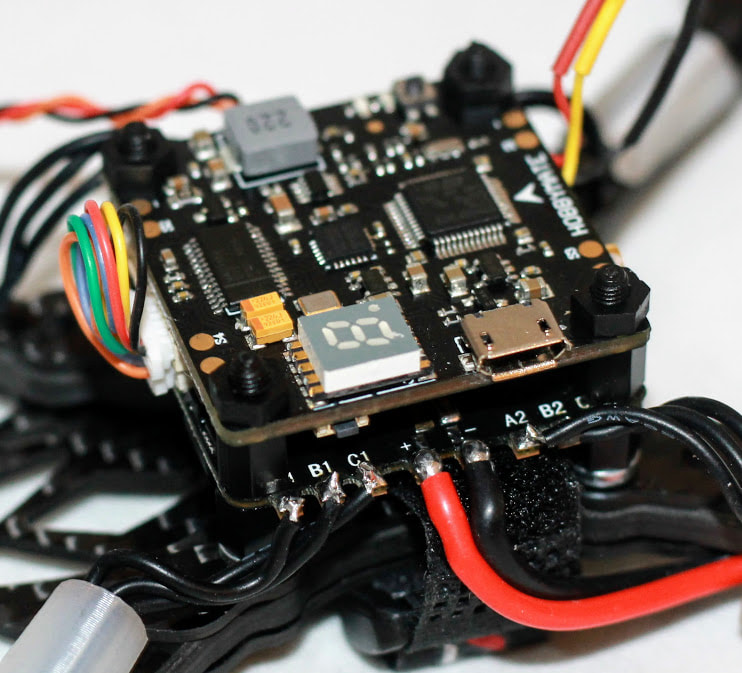
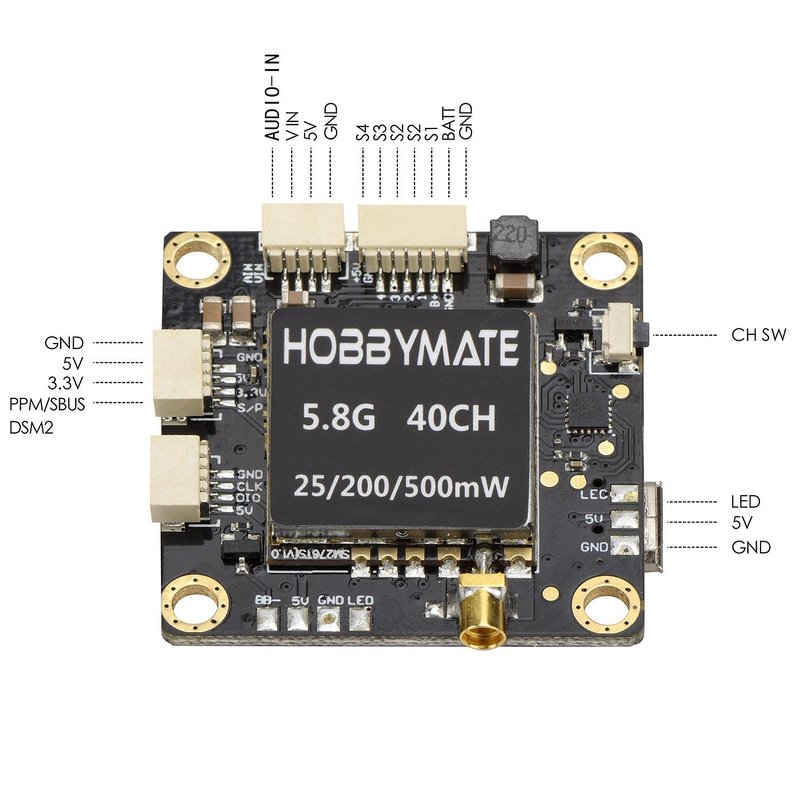
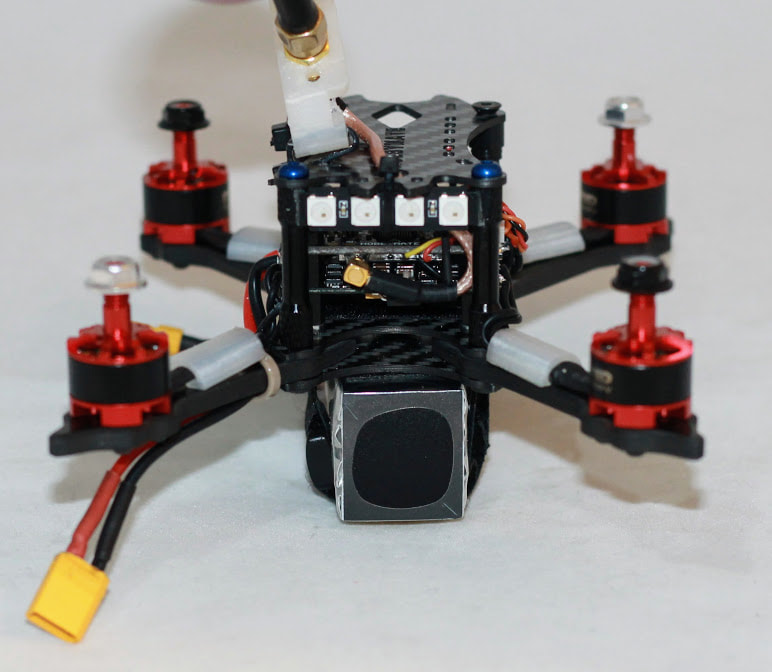
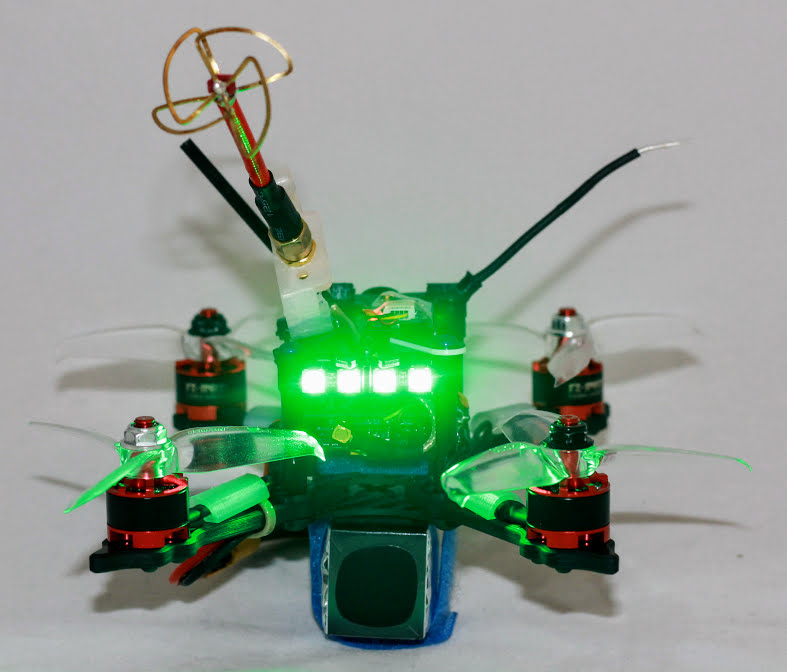
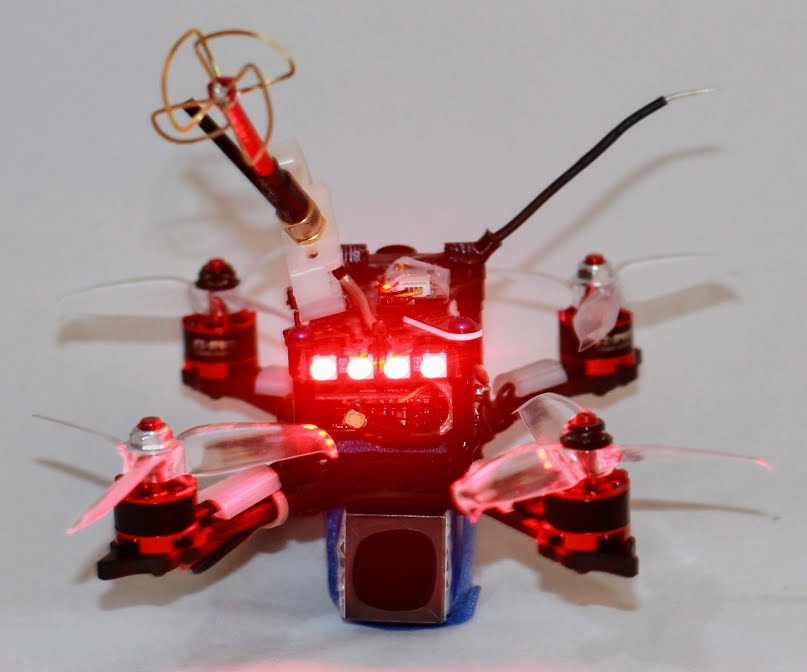
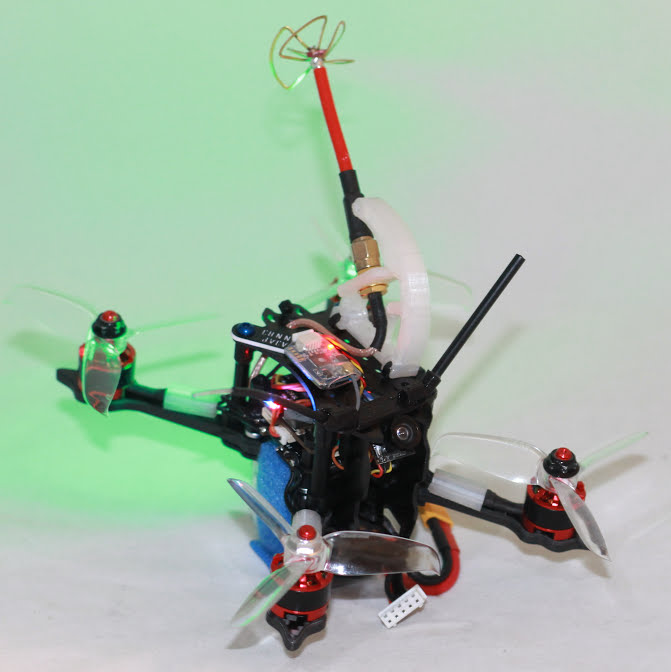
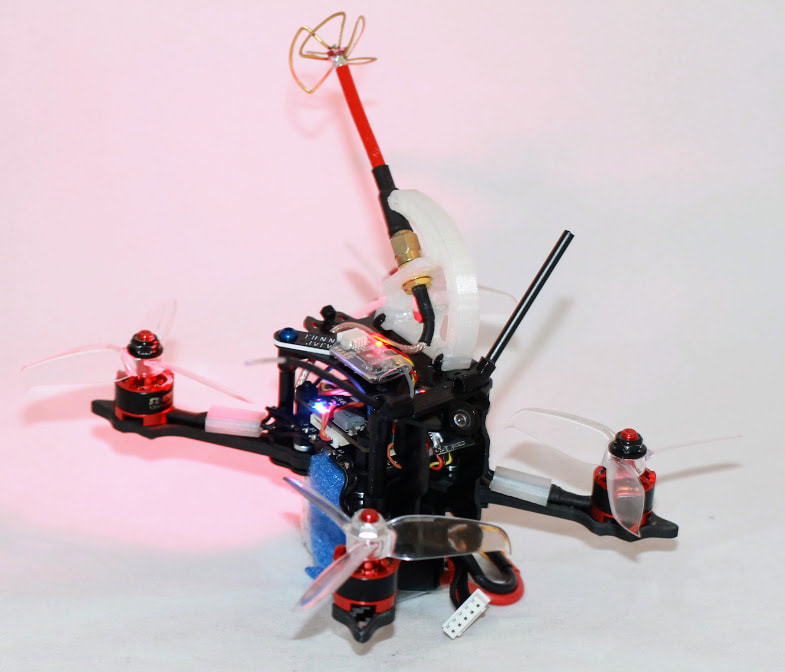
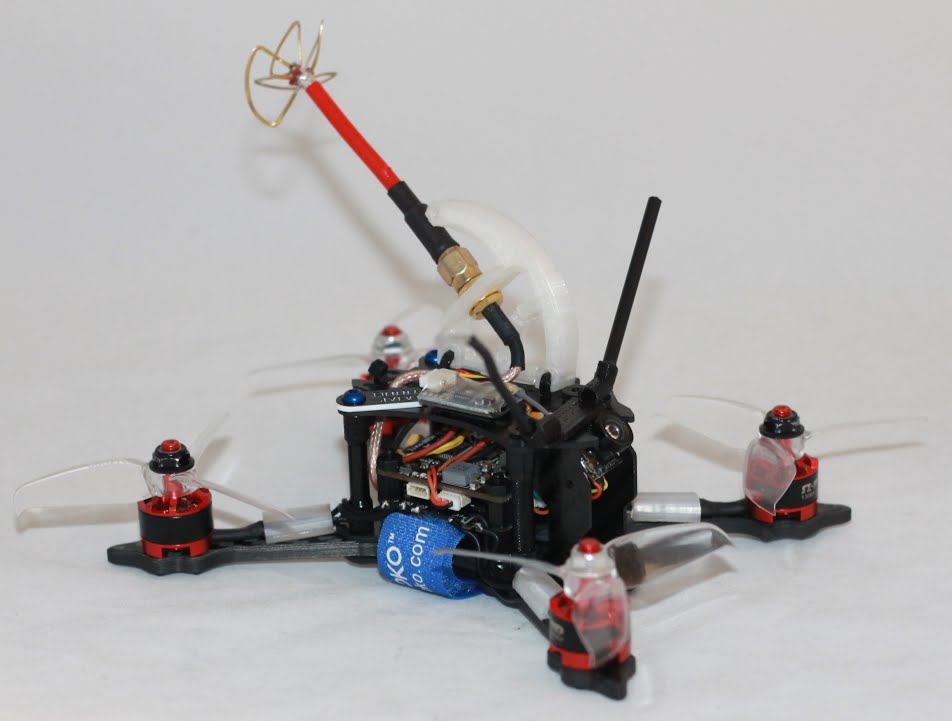
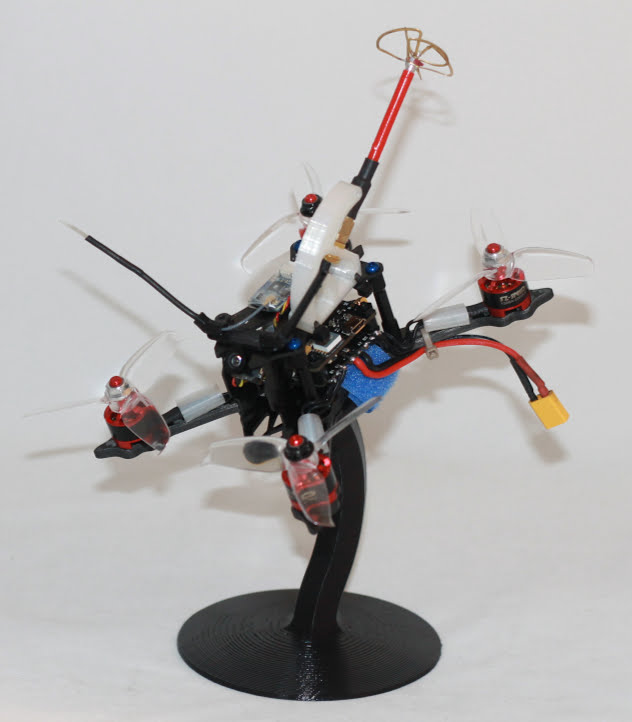
EDIT- 2/27/2018 This quad is now also available as a PNP, or BNF model for those that aren't into building it themselves. It can be purchased here for $133.90 Click me. Parts are starting to roll in. Got the frame for my next build. The HobbyMate Sparrow 145 145mm frame. The 20A BLHeli-S 4 in 1 ESC and F3 AIO Flight Controller with OSD should be here Tuesday. This carbon fiber frame should be very tough. The top and bottom plates are both 1.5mm thick, and the arms are a very stiff 4mm thick, and 8mm wide. I expect that this should be able to take a very good beating, and should you break an arm the entire frame kit is affordable, and readily available, so spare parts won't be an issue. This frame is designed for 130X-140X motors. I had some SZ Speed 1306 3300kv motors here that I decided to use for this build. I plan to fly this on 4s, but it should perform pretty well on 3s batteries as well. Everything has arrived now except for the FPV camera, and the receiver, so the build begins. I have taken detailed pics of every step along the way, so that anyone wanting to do this build, even those without prior build experience, should be able to complete it relatively easily, with plenty of visual references. The first thing to do is get the base, and arms of the frame assembled. I then mounted my motors to the arms. I also took this opportunity to add some 3D printed wire protectors, but these are obviously not a must have. Next up is to mount the 4 in 1 ESC to the standoffs, paying close attention to the board orientation. You want the main socket on the ESC board at the front of the quad. Once you have the ESC on the standoffs, you have a nice stable platform for soldering up the motor wires, and you can also solder on your power plug of choice. I opted for an XT30 for my build. I soldered my motor wires in the same order they come out of the motors. We can change the direction of rotation in BLHELI Configurator quite easily later, so don't worry about that at this point. Now that we have the ESC installed on the frame, and the motors are soldered up, it's time to install the flight controller on the next set of standoffs. Again, pay close attention to board orientation. Be sure that the arrow marked on the board is pointing towards the front of the quad, and that the USB connector for programming is on top. With this done, the short cable from the ESC bag can now be used to connect the ESC to the FC. While installing the FC I took a moment to also solder a lead for a small 4 LED light bar that I will attach to the top rear of the frame. I will program this later to be green when the quad is unarmed, and red when armed. Again, this is not a necessity, but I had the light in my parts bins, so figured I would put it to use. Now is also a good time to plug in the extension cable for the VTX antenna, and feed the wire up through the hole in the rear of the top plate. This hole is where HobbyMate intend for the user to attach the included connector, and then attach your antenna of choice. I however have opted to put my 3D printer to use again, and I printed this shark fin with an SMA mount that I will be mounting my antenna to. We are coming right along now, and our new quad is starting to look like something more than a pile of parts What we have left to do now is install our receiver, and FPV camera. The camera will simply plug into the board with the appropriate cable. I have plugged a lead into the receiver socket, and will solder those wires to my receiver once it arrives. After that we can get into Betaflight and get our new model ready for flight. The pics below should adequately describe our progress so far. Stay tuned for the next few steps, coming shortly. If you are by chance doing a similar build, and have any questions, please do not hesitate to ask, and I will do my best to assist. EDIT 1/10 Ok, let's get this build finished, and get this bird in the air. So, remember that we have the cable plugged into the FC for our receiver, so all that we need to do is solder the signal, power, and ground wires from that lead to the corresponding spot on the RX. We also have an unused cable from our flight controller that we will now connect to our FPV camera. Again this is simply connecting video out, power, and ground from the camera to the corresponding video in, power, and ground from the lead that plugs into the front of the FC right next to where we have the ESC plugged in. Now with our top plate installed, and everything wired up it was time to zip tie the LED light bar to the rear of the frame, and route our antenna wire into the shark fin, and get it zip tied to the frame as well. In the images below you will see the wiring diagram for the flight controller, as well as the pics of our assembled quadcopter. Now that we have got our new bird assembled, and wired up it is time to go into Betaflight, and get it programmed and ready for its maiden. Please feel free to ask any questions, if your aren't sure about something. Betaflight screen shots coming shortly Quick first flight video added below. I had to hurry due to more foul weather moving in. Programming updates coming soon. More flight video coming as soon as weather permits
0 Comments
Leave a Reply. |
Archives
June 2022
|
 RSS Feed
